CORN TISSUE SAMPLING GUIDE
Tissue sampling is an exercise in more. More data. More analysis. More efficient management. All to generate more profit.
“Over the past decade, we’ve collected 10,000-plus samples from around the country,” says AgriGold Agronomist Josh Johnston. “Thanks to that data, we can say beyond a shadow of a doubt that there’s a positive correlation between nutrient concentration within a plant and yield.”
Another key finding was that even the most intense managers struggle to attain and maintain appropriate levels of nitrogen (N), phosphorus (P) and potassium (K), despite heavy applications of the macronutrients. “That shows just because a nutrient is applied, doesn’t mean the plant is able to use it,” Johnston says. “It’s more complex than that.”
Tissue sampling gives farmers a better idea what their crops need as well as when and how they need it. The data can also show whether nutrients made it into the plant.
By acting as both a diagnostic tool and a feedback loop, tissue sampling helps farmers push yields and be more efficient with their inputs. It opens the door for greater profits.
When to sample
AgriGold’s tissue sampling protocol includes collecting six samples at precise points in the growing season based on growing degree units (GDUs):
350 GDUs
The plant switches from living on energy from the seed to living off its own root system. Looking ahead, it will determine ear girthuntil around 500 GDUs.
750 GDUs
This marks the beginning of the rapid growth stage. If nutrients are not high at this point, you’ll never catch up; the corn is simply growing too fast. Ear girth is determined, and the plant is setting up for ear length determination starting around 1,150 GDUs.
1,750 GDUs
Pollination is complete and grain fill begins, drawing significantly upon nutrient reserves.
2,000 GDUs
Midway through grain fill, farmers are working to make kernels as big as possible.
2,400 GDUs
There’s not enough time to get any nutrients into the soil, broken down and through the root system. Plants rely on farmers’ earlier efforts to continue filling grain. This is the final evaluation.
Consistency is critical when it comes to pulling those samples. Each data point is associated with a GDU by yield. This yield by nutrient density baseline helps with national comparisons and year-to-year repeatability.
Where to sample
Samples should be collected from the same general vicinity of the field. Choosing that sample site is important. AgriGold recommends selecting a spot that is average for the field. However, that can vary depending on a farmer’s goals. An agronomist can help farmers fine-tune their sampling methods.
Establish a baseline, build a road map
For the first year in the program, a farmer should stick with his or her normal fertility plan and collect tissue samples at the specified GDU intervals. That establishes a baseline.
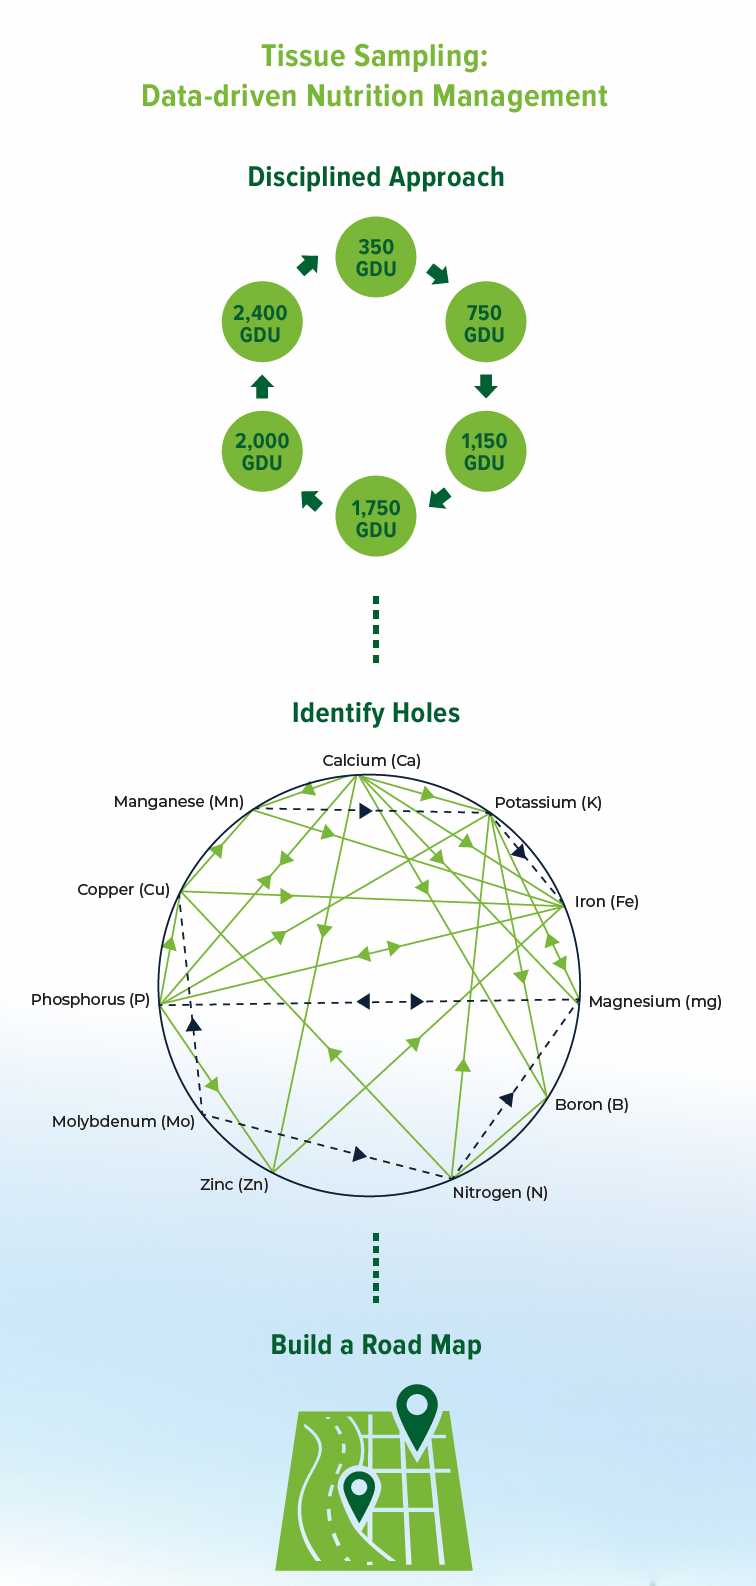
That baseline can be compared to AgriGold’s extensive database that shows where nutrient levels should be at each GDU point. From there, the farmer and agronomist can identify peaks and valleys in nutrient concentration and build a plan for remedying dips, imbalances and shortfalls.
That plan goes beyond product selection, encompassing application rates, methods and timing. Johnston explains, “You’re building a road map for your farm, your land and your style of farming — a road map specific to your location and your hybrids.”
What does success look like?
Success with tissue sampling isn’t measured in bushels — at least not directly. A farmer succeeds when an applied nutrient shows up in the plant’s nutrient concentration.
1. A strong start is critical
“Corn is like a thoroughbred racehorse. It needs to come out of the gates absolutely screaming,” Johnston explains. “That’s paramount for high yields.”
Nutrient concentrations are highest at the beginning of the growing season and diminish over time. “You need to start as high as possible to keep nutrient concentrations elevated longer,” Johnston explains.
A 2x2 placement of starter fertilizer can kick-start the growing season so crops charge out of the gate. “This early season jolt of highly concentrated fertilizer causes the plants and roots to grow faster and bigger,” Johnston explains. “This will get them over to side-dress faster, and since they have bigger, more robust root systems, the plants can grab dry fertilizer more efficiently.”
Johnston has also had success with a broadcast application of a mixture of urea and ammonium thiosulfate (ATS, a blend of nitrogen and sulfur) around planting in high-yield environments. “This is the secret sauce,” Johnston says. “Not only does this get a lot of sulfur in the mix for the crop, but this combination also increases nitrogen concentration at the beginning better than anything else I have tried.”
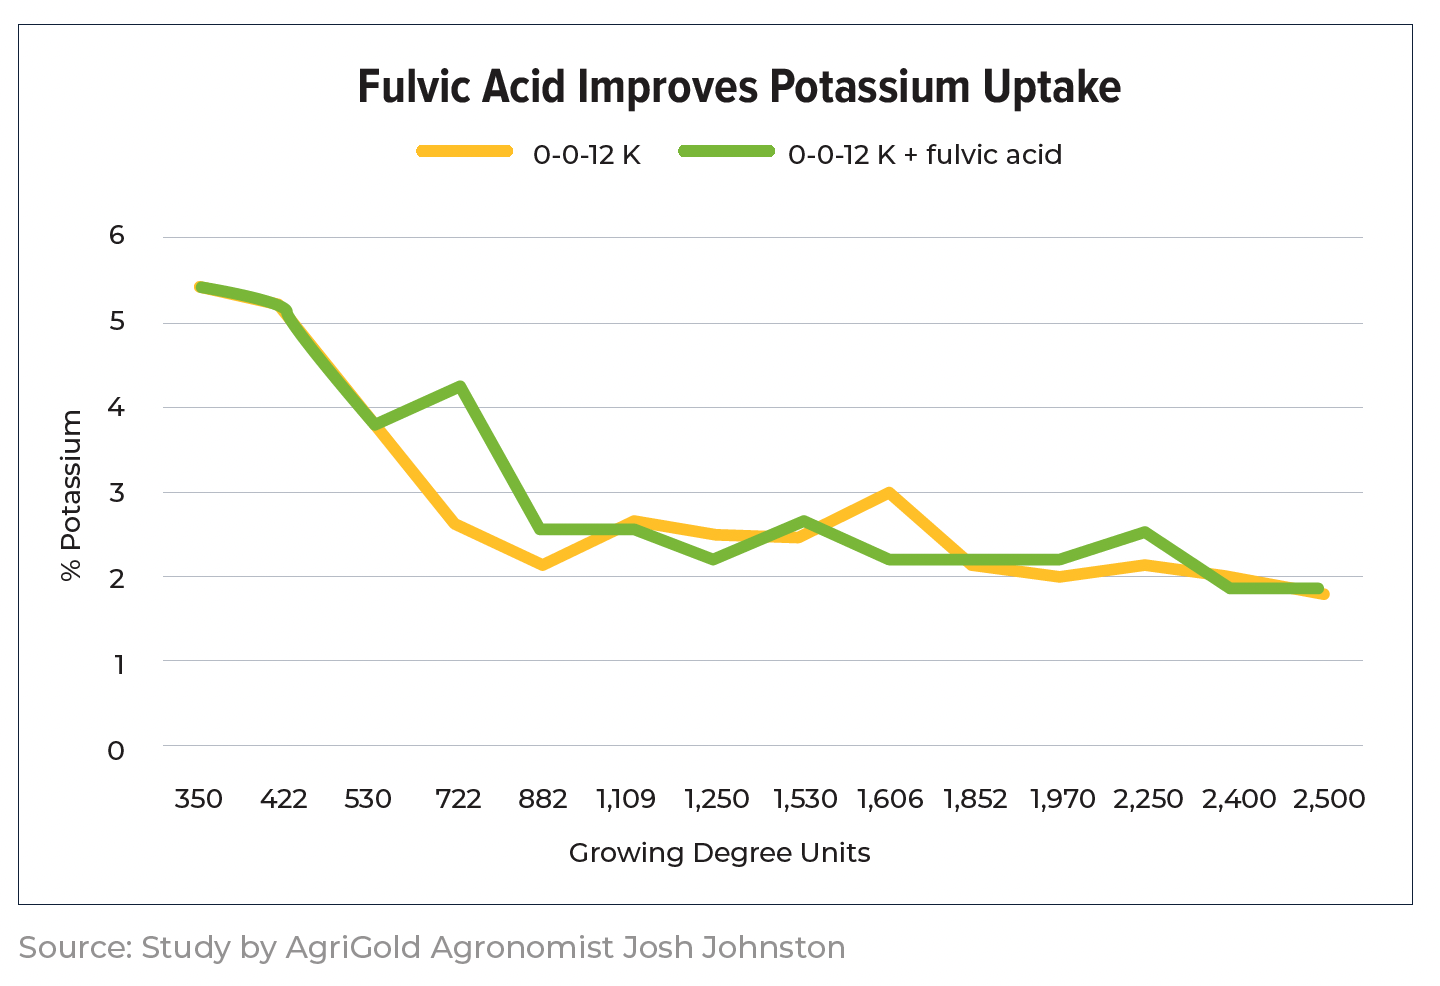
Sampling data signals that adding humic and fulvic acid to these concentrated bands of fertilizer also increases nutrition concentration within the plant. Fulvic acid acts as a natural chelator and has an especially pronounced impact on the uptake of potassium, which is one of the hardest nutrients to get into the plant.
2. Strategic nutrient timing pays dividends
By the time deficiencies are visible, bushels have already been lost and corrections are much harder to attain. An application strategy that considers 1) when the corn crop needs a given nutrient, and 2) how long it takes the crop to take up nutrients can pay dividends.
Take boron as an example. Boron is a key nutrient for grain formation, particularly when ears are forming within the plant and after pollination when ears are elongating. “I used to believe gallons and gallons of boron were needed,” Johnston says. “But tissue sampling revealed boron applications before these two times of ear growth can help overcome the dips in plant nutrient loads during ear formation.”
These targeted applications of boron not only feed the plant at the right time, but they also lessen overall usage.
3. Ward off a premature end to the growing season
The end of a corn plant’s life is just as important as its beginning, Johnston says. “Farmers should do all they can to ensure plant health all the way until it naturally defines its black layer,” Johnston says.
Premature death due to diseases like tar spot, southern rust, gray leaf spot and northern corn leaf blight can cost farmers bushels. Johnston’s research shows plant death just three days before black layer can slash yields by 12%.
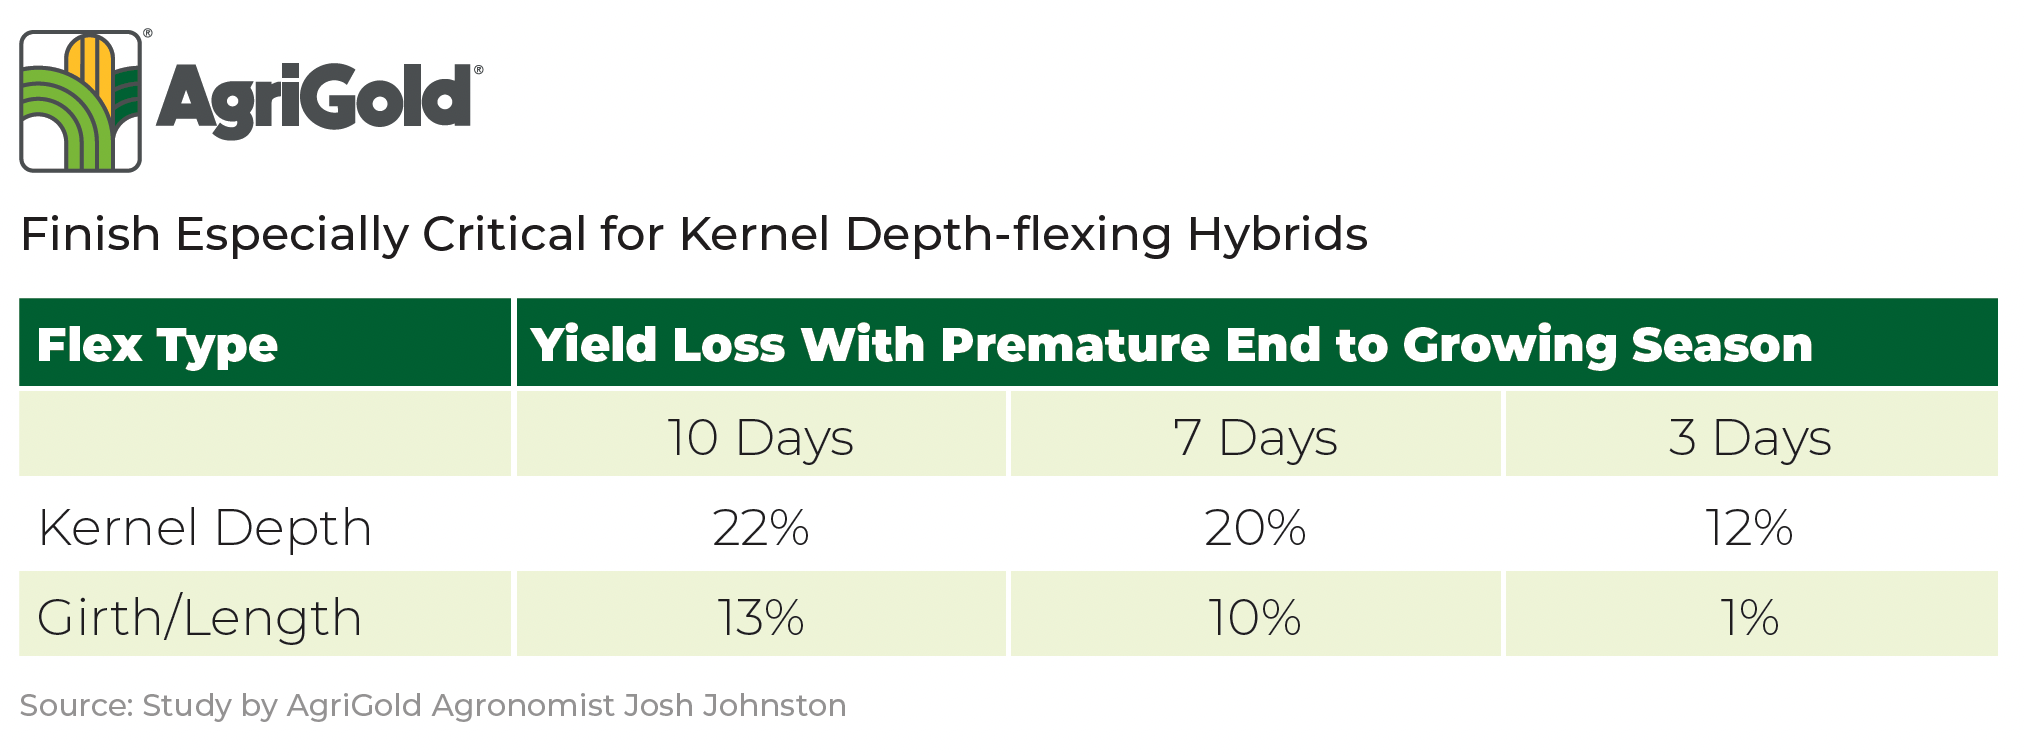
“Farmers need to focus on a strong finish, especially since most hybrids planted today flex by kernel depth, meaning they pack on bushels late in the season,” Johnston says. “Use high-quality fungicides to ensure
Tissue-sampling farmers turned advocates
Chad Porter
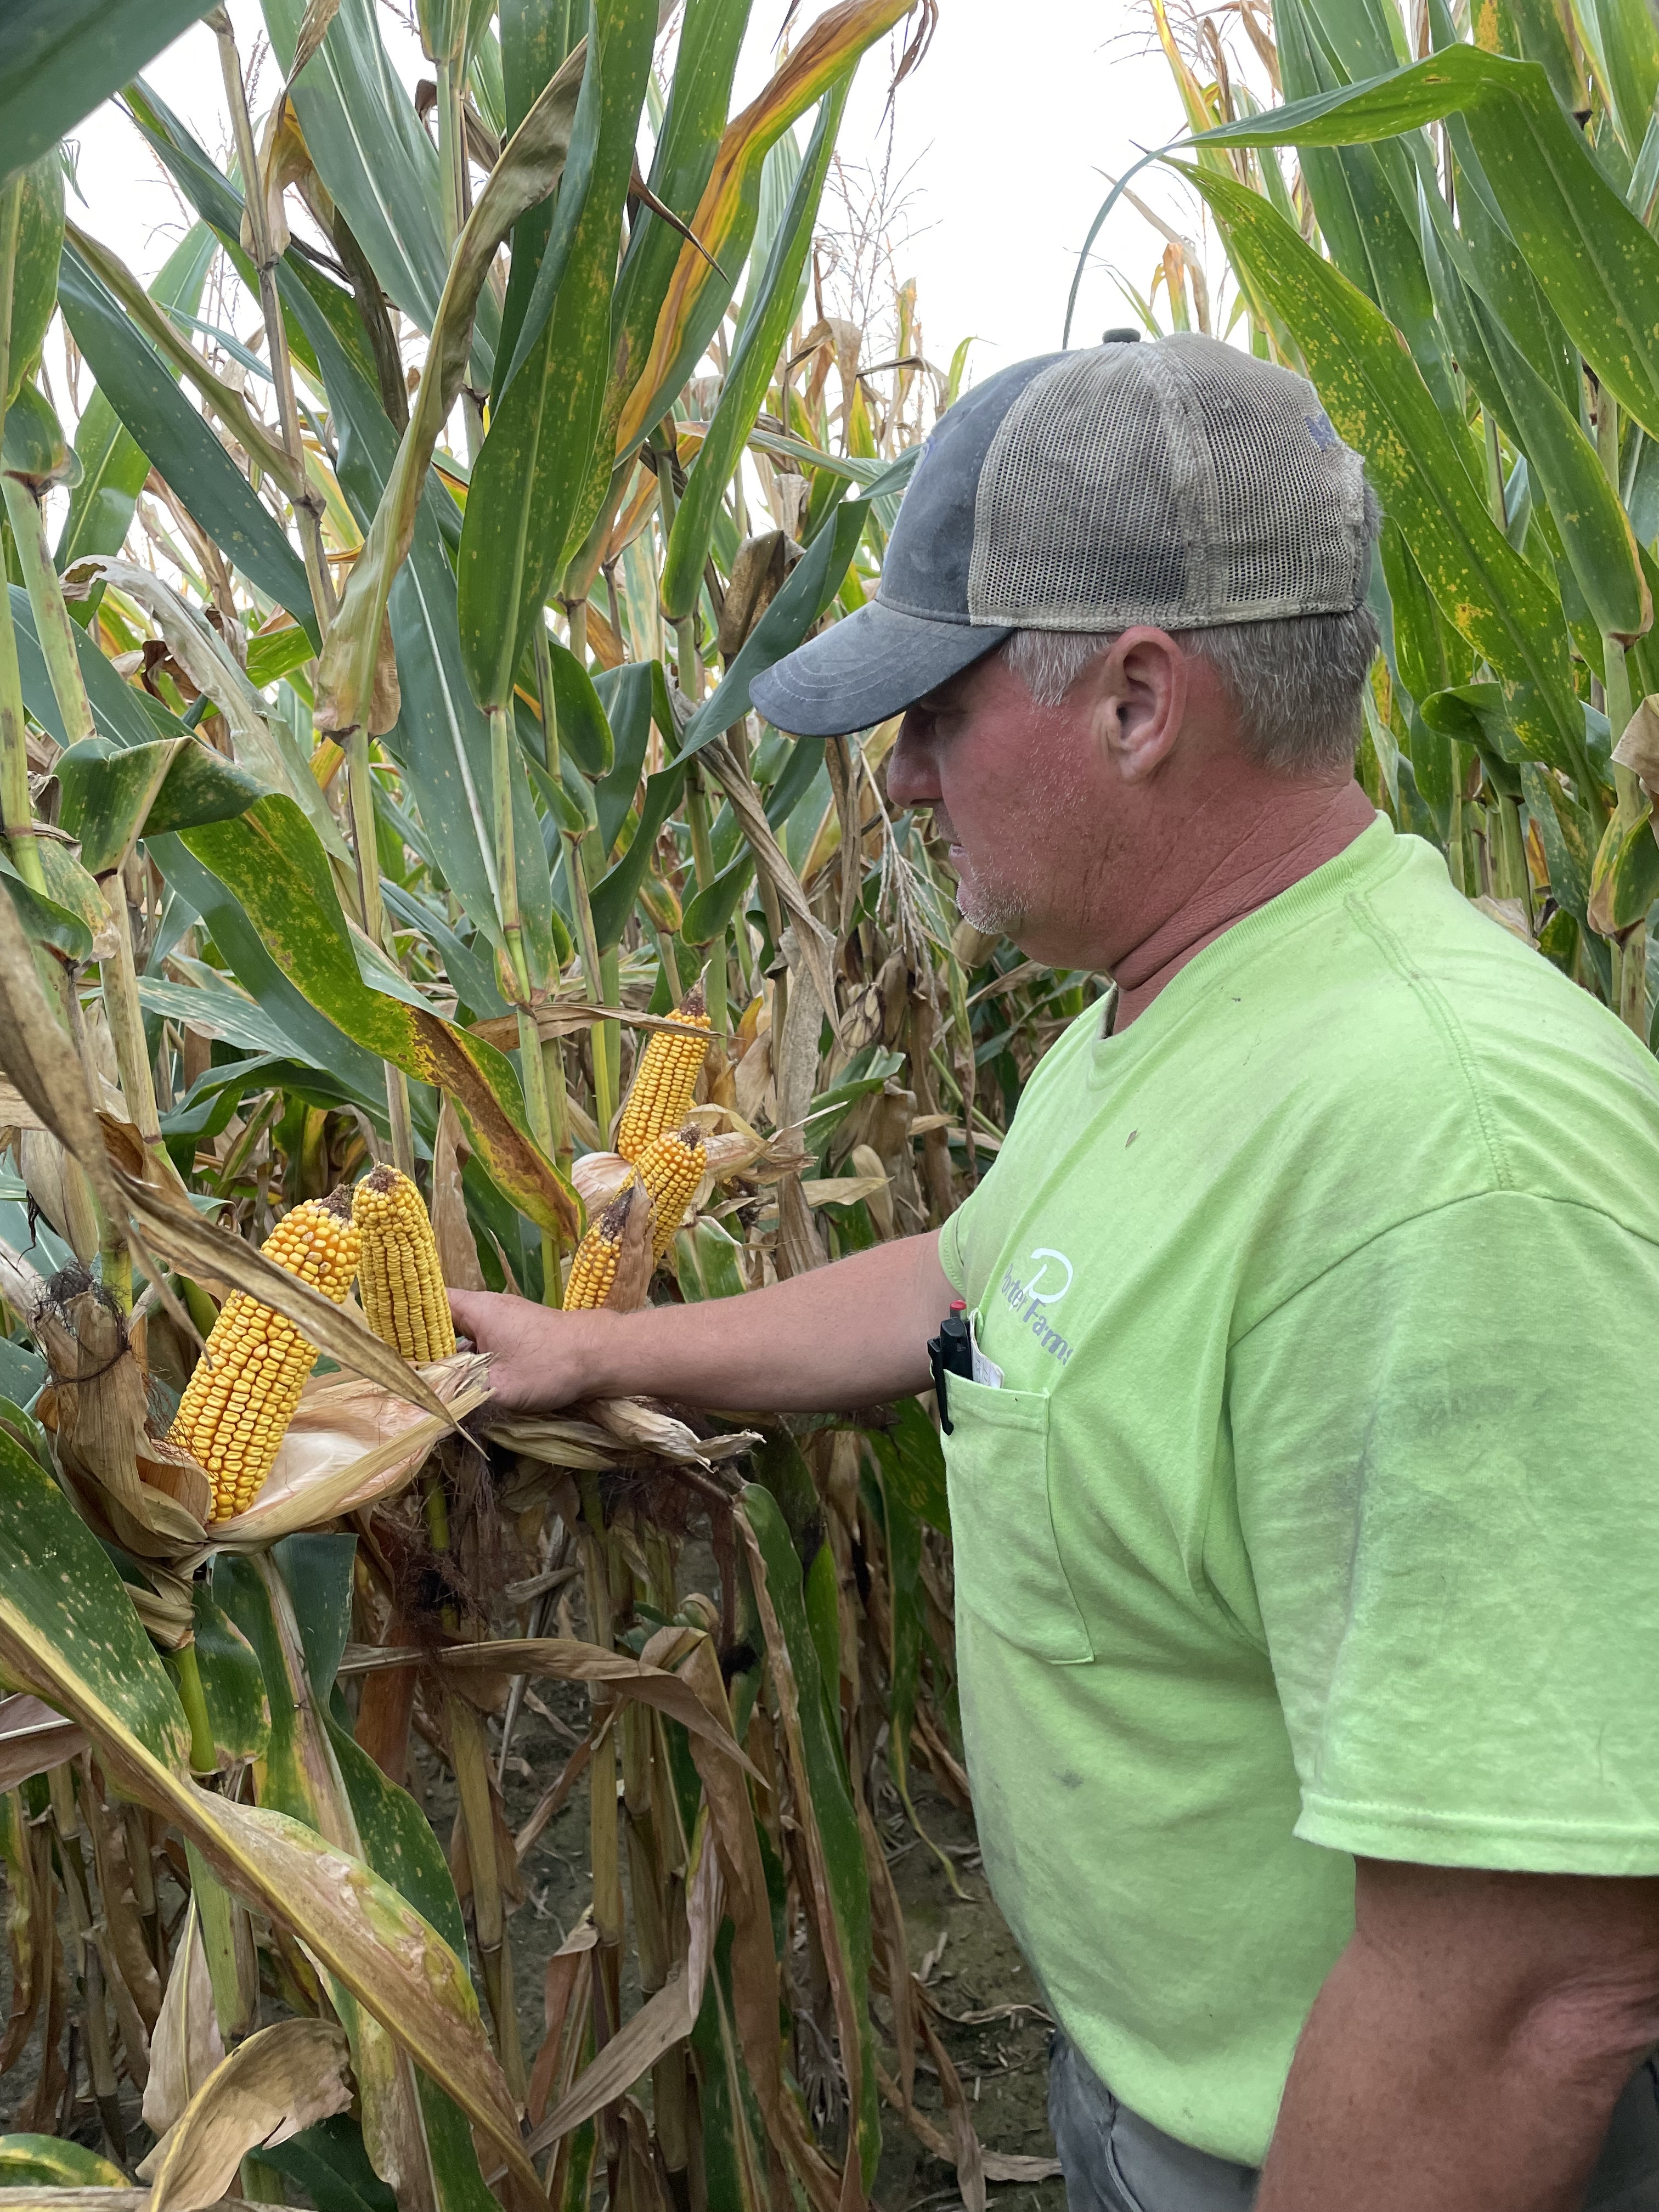
“The changes made based on tissue sampling have made me more profitable and a better steward of the land,” says Chad Porter, a farmer in Kentucky who has been following AgriGold’s tissue sampling protocol. He says the most impactful change was the addition of 10-34-0, a liquid fertilizer that’s 10% nitrogen and 34% phosphate, in the y-drops while side-dressing nitrogen.
“It has added 6 bushels to 8 bushels an acre in yield at no added expense,” Porter says. “I remove the 10-34-0 cost right out of my DAP budget, dollar for dollar.”
Porter has also incorporated humic and fulvic acid into his fertility plan and reevaluated the timing of his nitrogen applications. He had been y-dropping nitrogen in the V8 to VT stage of corn development, but sampling revealed nitrogen was needed earlier.
Now, Porter spoon-feeds his corn crop, applying fertilizer before planting, at planting, and two or three times via y-drop before the V8 window. His yield gains have accelerated in response.
Tissue sampling has also made Porter more confident deciding whether a new product is worth the investment. “I can trial a new product, and the tissue and yield data shows if it provides a yield benefit or not,” he explains. “I can try it at different growth stages to see where I’m getting the biggest bang for my buck.”
Garret Igleheart
Before getting involved in tissue sampling, Kentucky farmer Garret Igleheart says crops often got off to slow starts and looked a “little peaked.” He explains, “I thought I had a good side-dress application and didn’t pay a lot of attention to soil fertility balance or pre-plant nitrogen.” Tissue analysis showed change was needed.
“We’ve learned you must start with the highest concentrations of nutrients that you possibly can and maintain it,” Igleheart says. “Now, we apply a good slug of nitrogen with sulfur a couple of weeks ahead of planting to build that concentration up in the soil. Then we use the planter to band some NPK, boron and zinc.”
Doing so creates a “nutrient hot zone” for the plant to hit around the V3 stage of development so the nutrients are in the plant by the time it needs them at V5. While 2x2 hardware costs some money, Igleheart says the investment has paid off in efficiencies it has delivered over the years.
Igleheart also touts the use of fungicide to extend the lifecycle of the plant and grain fill. “Doing so allows what you’ve done all season to pack on those pounds at the end of the season, pushing yields over the top.”
The actual act of sampling has made Igleheart a better farmer. “It gets me into the field more often. I’m more observant. I’m watching emergence and the different growth stages more closely,” he says.
“Thanks to tissue sampling, we can manage this crop more efficiently,” Igleheart says. “We’ve improved our yield curve because we have paid more attention to the data.”
Get started with tissue sampling
Ready to see how tissue sampling can drive success on every acre? Reach out to your local AgriGold agronomist to unlock the full potential of your acres.


